Good Morning Splodgy Splodgers,
How are you all today? I am very excited today because we have a great tutorial on how to make a SplodgeAway Wall Hanging by Claire who we call Dimply, I don't actually know why we call her that but we all laugh in the shop if somebody says 'Claire'
If you would like to make this hanging or your own alternative hanging you will need:
SplodgeAway Easy Ink or High Elegance Card Stock
Viva Silver Croco Paste
Copper Pearl Liquid Pearls
Gesso
Acrylic paint
Baby wipes
SplodgeAway Masks, I have used:
Cog Heart
Star The Lot and
All About Roses 1
SplodgeAway Wooden Frames
String

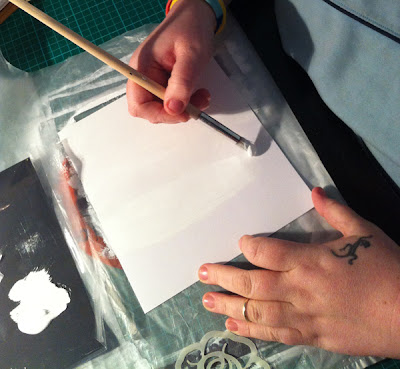
Take a piece of SplodgeAway Card Stock and apply gesso on each side. Leave to dry or slowly heat with a heat tool.
SplodgeAway Wooden Frames
String

Take a piece of SplodgeAway Card Stock and apply gesso on each side. Leave to dry or slowly heat with a heat tool.

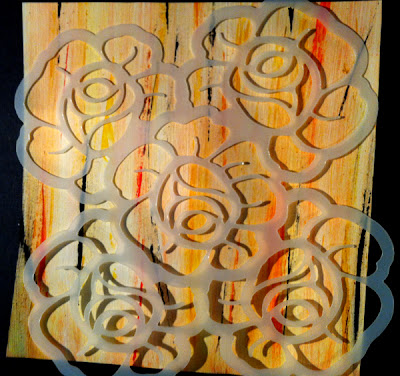
When the gesso is dry pick some acrylic paint up on a wet wipe and create your own unique background. To create the lines use something like a old credit card, pick up some acrylic paint and in a scratching motion place on the card.
Using one of your chosen masks place it over the cardstock. To keep the mask in place try using a stick and spray adhesive
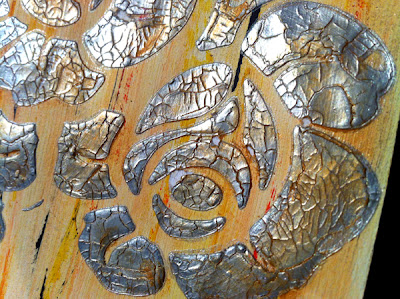
Cover the mask using a credit card with Croco. The thicker the layer the bigger the cracks.

When the Croco has dried and cracked, rub in liquid pearls to give a nice shine to the mask.
Repeat this process for each panel of your hanging.

The wooden frames have been decorated with gesso and very carefully heated up until it bubbles.

Dimply used the following masks for her projects:
When you use any paints or pastes with the mask ensure they are cleaned with warm water and soap to clean them. The sooner the better,
Thank you to everybody for taking the time to visit the blog and also to Dimply for the great tutorial.
Enjoy your weekend,
Susan x
Thank you to everybody for taking the time to visit the blog and also to Dimply for the great tutorial.
Enjoy your weekend,
Susan x


Wow what a fab project, I love all the texture and that crackle looks fab
ReplyDeleteClaire xx
Thank you for the tutorial! Fab project, crackles look great xxx
ReplyDeleteOOOO Love it Claire xx great tutorial xx
ReplyDeleteGreat techniques and colour Dimps. Nice one.x
ReplyDeleteNot seen that before Dimps.... U been hiding things:-) Looks fab x
ReplyDeletewow dimps love it xxxxx
ReplyDeletereally like this project.x
ReplyDeleteHi Dimps - just catching up had a busy time lately. This is a great project and a really good picture tutorial, I love the background. Sam xx
ReplyDeleteBeautiful plaques I have never used gesso orcroco can you tell me what they are and how they work I love the effect but would value the answer maryhorner53@gmail.com thanks
ReplyDelete