
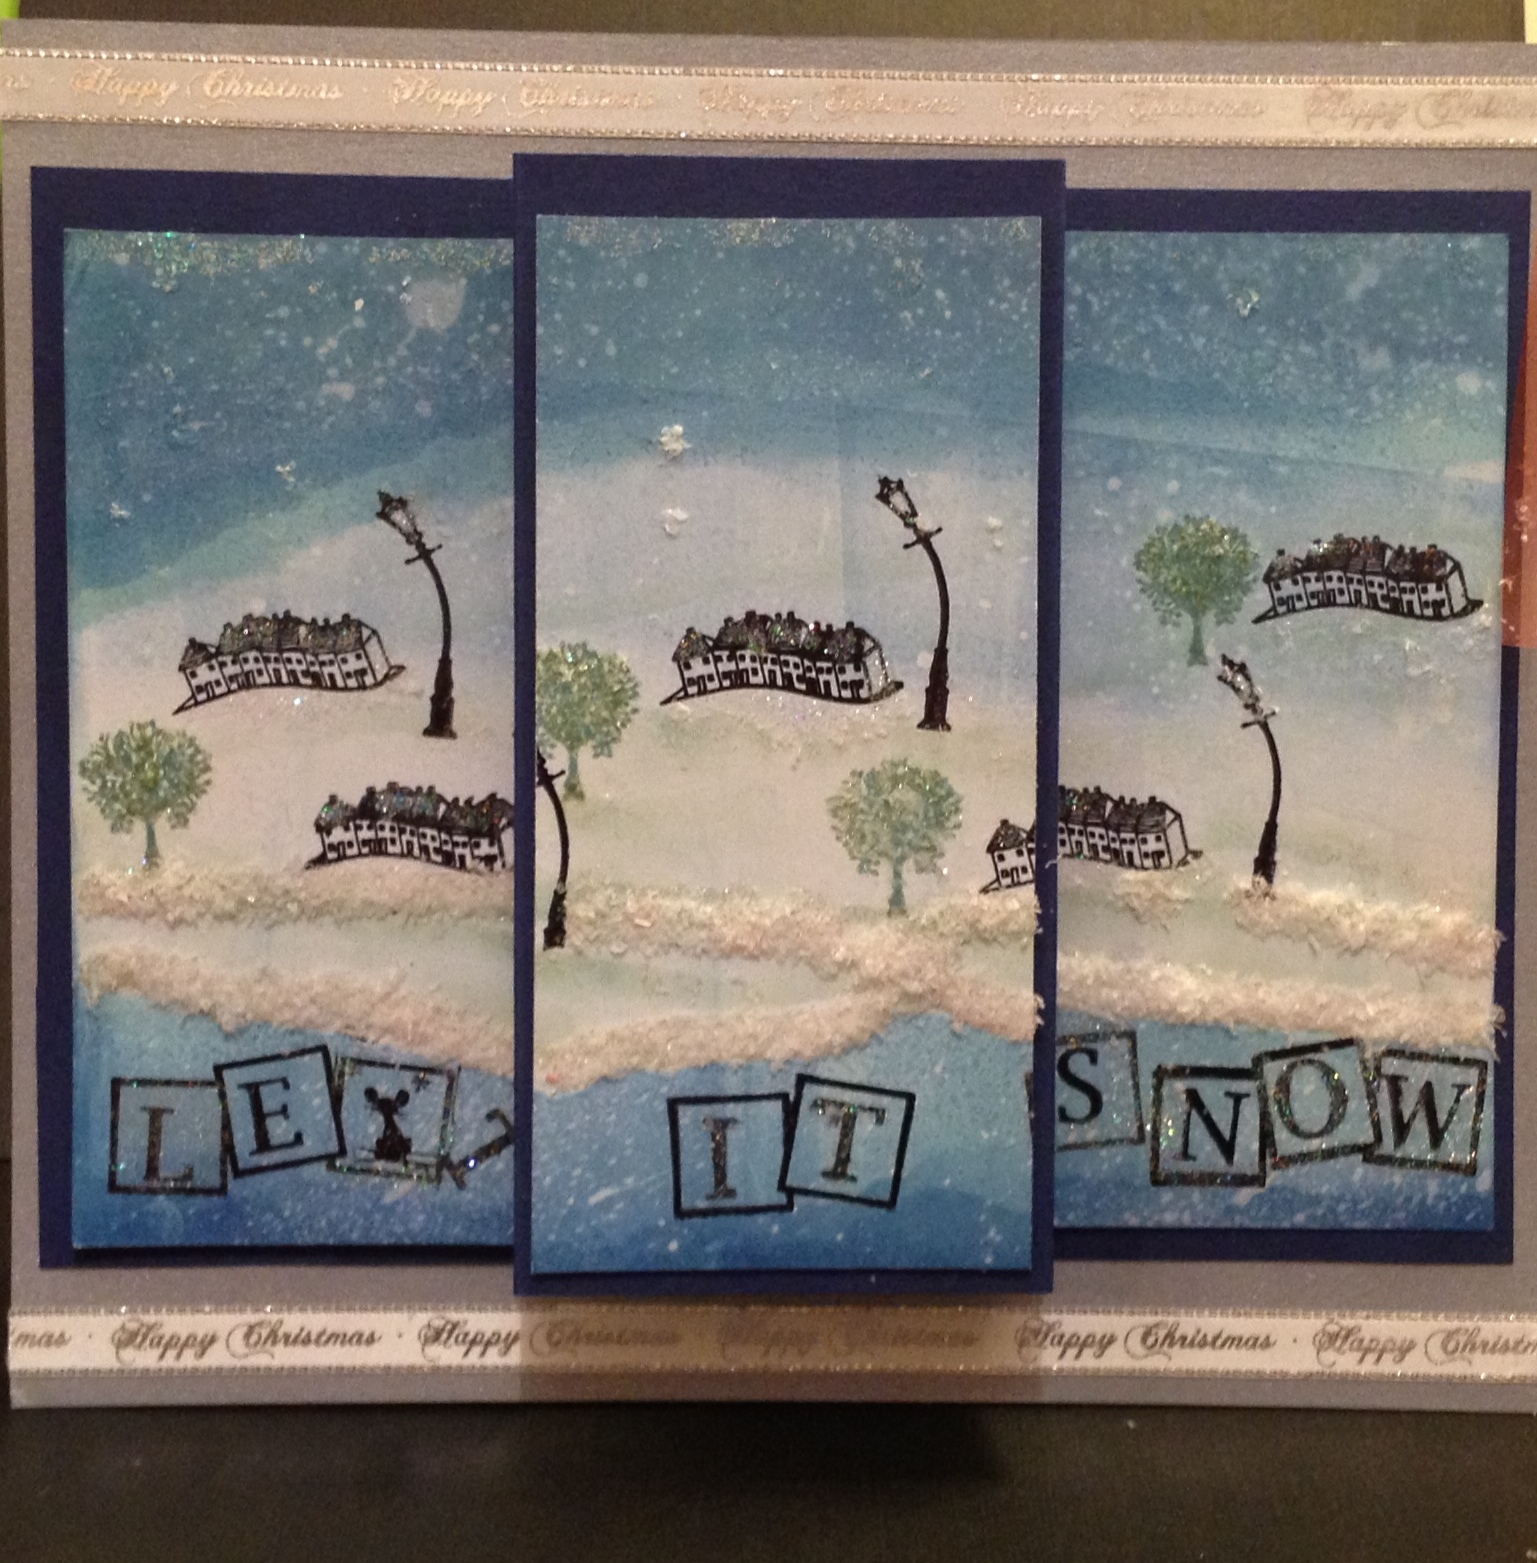
Let It Snow
By Sam Crowe
SplodgeAway Mat
Brayer
Hougie Board
Distress Inks - Broken China, Weathered Wood, Faded Jeans
Adirondack Ink - Juniper - Meadow
Ranger Archival Black Ink - for stamping
Card Stock from Suzicraft.com
Clarity Card stock - Coated
Clarity Stamps - Village & Letterbox
Flowersoft from stash
DecoArt Glamour Dust
Craft Glue
Red Tape
3D Tape
Method
Stamp the Cottages across the middle section of the clarity A5 card (Landscape) plant one tree and one lamp post per row of houses, on each side - all the time bear in mind this is going to be equally cut into 3. (confession time) I didn't bear this in mind but it was my lucky day because the cut was just in the right place!!
Masking and Sponging - Tear 3 pieces of paper, one for ground around the houses - green grass, one for the separation of the letters and one for the sky. I mixed the sky and the bottom one around to get different directions. Start with the Meadow for the grass, put the ink on the Splodge Mat, get a sponge and make it into a "round" so there are no lines, ink up the sponge and dab off onto the mat, bring in the ink from over the top of the paper start very light first, hardly any ink, and just dab it down over or Sponge it by dabbing. Randomly around the houses and trees, etc, at various angles, leave white in the middle which will give the impression of snow.
Brayer - Put some Juniper on Splodge Mat and directly underneath some Broken China - make sure these line up and do not exceed the width of the brayer. Get you brayer and roll back and forth over the colours until they are blended and have disappeared into the mat. Cover middle section of picture - we are doing the sky - put your paper at an angle starting at the corner start to brayer on your mat and across the corner of the sky and the protective paper in the middle and bray right off the other side, keep doing this and moving over toward the middle without inking again except from what you left on the mat. Do the other corner the same holding it whichever way feels comfy. I just tend to work backward over the opposite corner. Move your paper up getting darker and darker, and using edge at different angles.
Do the same with the bottom part of the card after you have stamped the squares for your sentiment, remember to spread these out into three equal parts across the card. You must give you ink time to dry or lay a piece of Kitchen roll over and flatten with your hand to take excess ink without smudging.
Keep going till you are happy with the result. Get a water spray and spray sparingly from a bit of a height over each section individually, sky, middle, bottom, as you will want different depth of effect on the sky to the middle etc.
Fill in letters, making sure none are upside down (who did that) again pat dry. I put a mouse in one d knocked the T over as if he had thrown it out? Your choice? The mouse is from the 12 days of Xmas stamp I just inked the mouse on its own.
I painted normal craft glue on with a flat paint brush under the houses around the hills etc and put the flowersoft on. For the thicker snow I used the Red double sided tape and just twisted it about. With a tiny bit of glue again paint the roof tops, the letters and the lamp post lights and put the Glamour Dust on.
Cut card evenly into 3, get out your Hougie Board measure a piece of navy A4 so that the three pictures fit evenly across you will need to trim about 1 and a half inches off one side only - excess. From middle picture measure Half centimetre, or do it by eye, tiny gap between picture and first crease, second crease measure 2" either side from centre picture and score. Fold so that the centre section pops out over and the side panels go back. Fix silver card to and 8" by 8" card stock, overlapping width ways so that you are not squashing in the centre of the picture. Add some form of ribbon top and bottom on silver card, mine says Happy Christmas and you are done. Its best to have the card open from the bottom for added strength rather than the side.

Hope you give it a go and copy SplodgeAway on Facebook to show us what you have done!
Hope you like it and it makes you get your Brayer out!
Sam
Sam I love this card. A little different me thinks. Have had to pass on brayer challenge as so busy with alsorts and not experienced enough with it to have a reasonable quick go.lolx
ReplyDeleteOops - what week is it? Just so happened I have done it for this week too. thanks for comment. xx
DeleteNice one Sam x
ReplyDeleteGreat Card Sam
ReplyDeletesee you had a bit of bother at times lol xx
Thank you for your comment lindylou, I always have bother,I just normally hide it!!
DeleteOooo this is a right 'ol stunner! ... Super work Sam and yeah ... great minds think alike lol lol lol xx
ReplyDelete